How to Replace a Brick Without Destroying the Wall
Replacing a single brick sounds simple until you're standing in front of a wall with a cold chisel in one hand and a hammer in the other, staring at a brick set in mortar for 60 years. Do it wrong and you crack the neighbors. Do it right and nobody ever knows you were there. That's the goal. Invisible work.
Assess Before You Swing
Look at the brick. Spalled? Cracked through? Loose? Each condition tells you something different. A spalled brick is usually surface failure — mortar around it might be fine. A brick cracked through might have shifted, meaning the mortar bed is compromised. A loose brick means mortar already failed and extraction is easier than you think.
Check the surrounding bricks. Damage on the neighbors means a bigger issue. Replacing one brick in a wall with foundation settlement is like putting a fresh tire on a car with a bent axle.
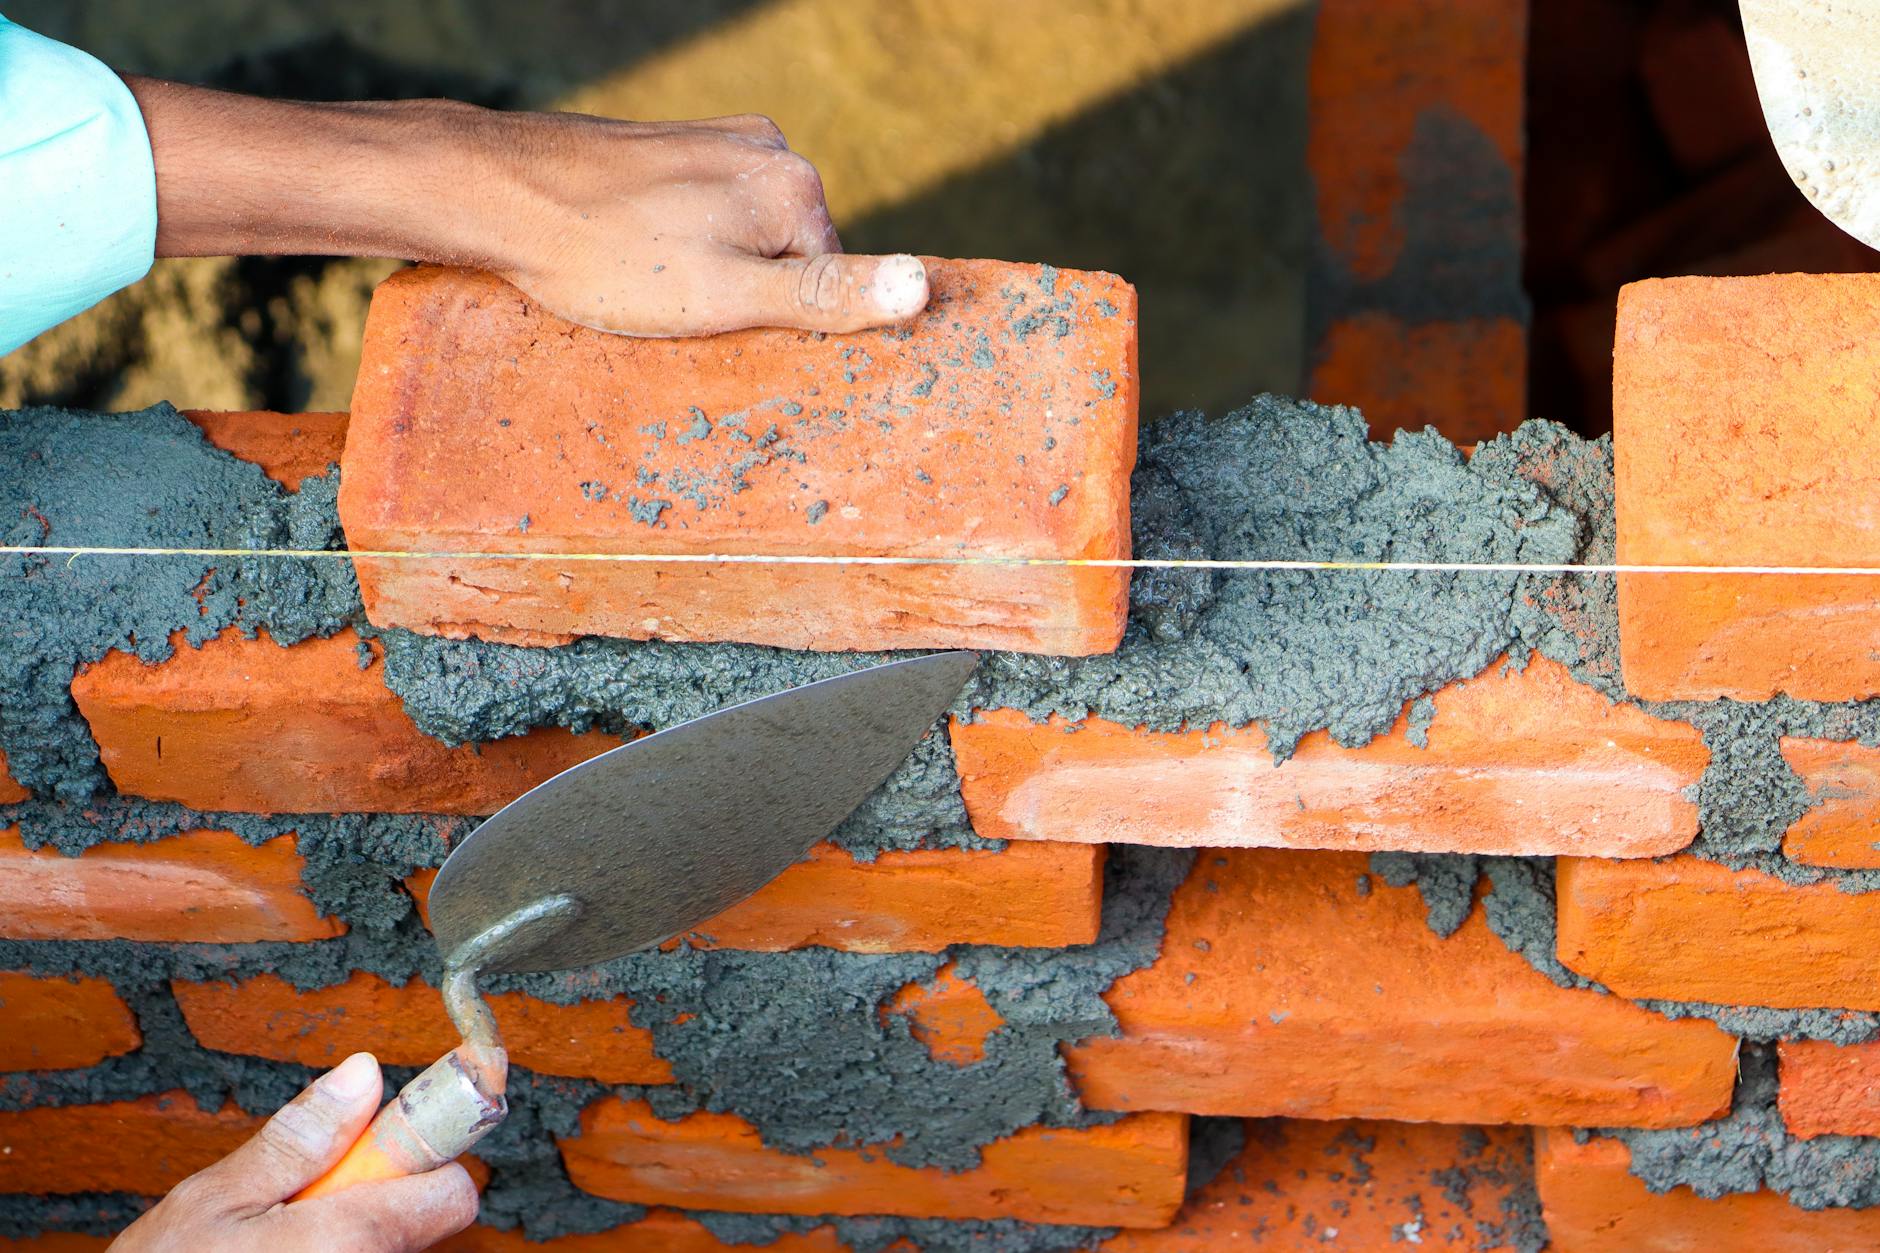
Removing the Old Brick
Work the mortar joints, not the brick. Cold chisel and a 3-pound hand sledge. Start with the top joint. Angle the chisel at 30 degrees and work along it carefully. Always angle away from neighboring bricks.
Clear the top and both sides, then the bottom. The brick should loosen. You're removing about 3/4 inch of mortar all the way around. If it's stubborn, drill a series of small holes through the brick face with a masonry bit and break it out in pieces. Slower, but you won't crack a neighbor.
Cleaning the Cavity
This separates professionals from weekend warriors. Clean every surface — top, bottom, sides, back. Cold chisel, wire brush, patience. New mortar bonds to clean masonry, not dust. Spray with water — damp, not pooling. Wet brick bonds better than dry.
Setting the New Brick
Butter the top and both sides with 3/4-inch mortar. Type N for residential, Type S below grade or high-exposure. Slide it in — don't slam. Push until flush, then fill the bottom joint with a tuck pointer. For expert brick repair services, consult a professional mason.
Tool joints to match the existing profile. Concave, V-joint, flush — match what's there. A mismatched joint screams "patch job" louder than a mismatched color.
Color Matching
New bricks are bright. Old bricks are weathered. Salvage a matching brick from a hidden spot — behind a downspout, inside a closet. Replace that hidden spot with the new brick. Put the old matching one where everyone sees it. My father called it "borrowing from Peter." The trade's been doing it forever.
Final Cure
Keep new mortar joints damp for 48 hours minimum. Mist gently two or three times daily. Mortar cures by hydration, not drying. Let it dry too fast and it cracks. Patience finishes the job.